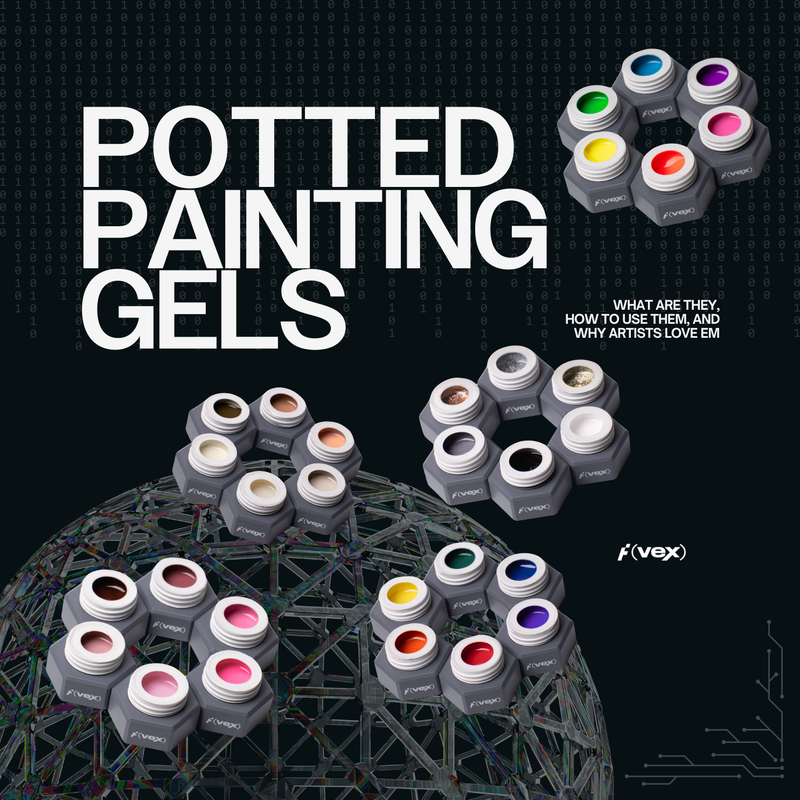
Potted gel polish is having a moment, and honestly, it’s about time!
With more nail artists craving control, cleaner lines, and custom shades that don’t drip or flood, the classic gel bottle just doesn’t cut it for every look. Enter: the jar. A compact, pigment-packed pot of possibility.
In this post, we’re breaking down exactly what potted gel polish is, how it compares to other gel types, and why it’s become a go-to for so many artists working in high-detail, high-payoff styles.
We’ve got comparisons. Step-by-step application tips. Brush recs. FAQs. And of course, a not so subtle shoutout to our Vextura Studio Paint, a multipurpose gel that’s clean-curing, chrome-friendly, and built for both line work and smooth coverage, without needing a separate pot for each.
We’ve compiled everything we know about pot gel, class is officially in session!
What is potted gel polish?
Potted gel polish is gel color packaged in a jar instead of a bottle, applied with a brush rather than a built-in wand. (Gasp! Okay, you could’ve guessed that much) Here’s the real tea, it’s thicker than bottled gel, giving you more control for precision work like line art, color blocking, or mixing your own shades.
Also called gel in a pot, potted soft gel, or potted gel paint, this type of gel isn’t the same as builder or structure gel. It’s not for sculpting or adding length, it’s a color gel made to lay smooth, cure clean, and hold sharp lines when you need it to.
You’d reach for a pot over a bottle when:
- You want a pigment that stays put for fine detail
- You’re mixing custom colors or finishes
- You need crisp coverage in a thin layer
- You’re working off a palette with different brushes
It’s a studio essential for anyone who likes control, flexibility, and creative freedom with how they apply color.
TL;DR (For you skimmers out there)
- Potted gel polish is gel color in a jar you pick up with a brush. It’s thicker for control and precision compared with bottled gel.
- When to use it: crisp line work, French details, color blocking, custom mixing, and full coverage in thin coats.
- Potted gel vs bottle gel: pots give better control and mixability; bottles are faster for plain, swipe-on color.
- How to apply: prep and base, load from a palette, apply a thin even coat, cure 30 seconds for light shades or 60 seconds for darks, repeat for opacity, then topcoat.
- Avoid issues: wrinkling means layers were too thick or under-cured, keep coats thin and cure to spec.
- Chrome tip: for pigments, cure the color layer 30 to 40 seconds, rub in, then seal.
- Tools that help: flat brush, fine liner, clean palette, lint-free wipes, good lamp.
- Meet Vextura Studio Paint: a multifunction pot for coverage, line work, and mixing that self-levels, cures clean in thin layers, and is HEMA- and TPO-free.
Potted gel vs bottle gel, what’s the difference
Both give you cured color, but they behave very differently. Potted gel polish lives in a jar and you load it with a brush from a palette. Bottled gel comes with a built-in brush and flows thinner.

Here’s the side-by-side:
1. Package & brush
- Potted: Jar format. Load from a palette with the brush you choose.
- Bottled: Built-in brush designed for quick swipes.
2. Viscosity & control
- Potted: Thicker, stays where you place it, razor-sharp edges.
- Bottled: Thinner, self-levels fast for smooth coverage.
3. Speed
- Potted: Slower setup, higher precision.
- Bottled: Fast two-coat routine.
4. Mixing & custom shades
- Potted: Mix on a palette, easy sheers and new tones.
- Bottled: Mostly straight from the bottle.
5. Full-coverage use
- Potted: Yes, in thin coats with proper cure. Test first.
- Bottled: Yes, it’s the default.
6. Wrinkling risk
- Potted: Higher if coats are thick or under-cured.
- Bottled: Lower at standard coat thickness, still needs full cure.
7. Chrome timing
- Potted: Often a reliable 30–40s grip window before topcoat.
- Bottled: Varies by brand; test your timing.
8. Hygiene & handling
- Potted: Load from a palette, cap between nails, avoid double-dipping.
- Bottled: Keep neck clean, recap quickly.
9. Learning curve
- Potted:Slightly higher; brush choice and pressure matter.
- Bottled:Low; familiar, quick.
When to pick each
- Choose potted gel when you want control, mixability, razor-sharp lines, or thin, even coverage you can build.
- Choose bottled gel when you want fast, reliable color with minimal setup.
If you want a pot that handles both coverage and detail in one jar, try Vextura Studio Paint. It self-levels, cures clean in thin layers, and plays well with chrome at a 30–40 second window before sealing.
Potted gel vs art gel, builder gel, and soft/hard gel
Quick map: “Potted” describes the format and feel. “Soft vs hard” describes removal. Different axes.
- Potted gel polish: color in a jar you use with a brush. Great for coverage and detail when applied in thin, well-cured coats.
- Art gel: thicker, ultra-pigmented for razor lines and micro graphics. Some wrinkle if you try full-nail coverage. Test first.
- Builder gel: for structure and overlays. Build the nail with builder, then paint color on top.
Soft vs hard gel:
- Soft gel soaks off with remover. Many potted gels are soft gel.
- Hard gel files off and is used for strong overlays or extensions.
Check the label for removal and cure specs.
Want one jar that does coverage and crisp lines? Vextura Studio Paint was tuned for both in thin layers with clean cure.
How to apply potted gel polish
Follow these steps for clean coverage and crisp detail. Keep coats thin and cure to spec.
- Prep and base
Clean, shape, lightly buff, de-dust. Apply your base and cure. - Decant to a palette
Lift a small bead from the pot, place it on a palette. Load a flat/oval brush for coverage or a liner for detail. - Apply a thin, even coat
Float from center to sidewalls, keep pressure light. Avoid the skin. - Let it settle
Give it a second to self-level before curing. - Cure correctly
Cure 30 seconds for lighter shades. Cure 60 seconds for dark colors or thicker passes. Rotate thumbs for full exposure. - Repeat for opacity
Add another thin coat if needed. Thin layers beat thick ones. - Detail work
Switch to a liner brush for French lines, graphics, or lettering. Cure between passes. - Topcoat and seal
Finish with your preferred topcoat and cure to full hardness.
Chrome tip: For pigment rub-ins, cure the color 30–40 seconds, apply chrome, then seal.
Mixing tip: For sheer washes, mix a touch of color into clear base on your palette.
Hygiene tip: No double-dipping. Keep the pot capped and your palette clean.

Tools you’ll love for potted gels
Brushes
- Flat or oval gel brush (4–6mm) for smooth coverage and cuticle-area control
- Liner brush (5–9 mm) for French lines and graphics
- Ultra-fine liner (3 mm) for micro details and lettering
- Cleanup brush with a tiny bit of alcohol for sidewalls
Palette + handling
- Glass or metal palette to decant color and mix custom shades
- Spatula for clean product transfer
- Silicone mat under your palette to keep jars steady and catch drips
Lighting + curing
- Pro UV/LED lamp with even output and a timer you trust
- Thumb rotation habit so sidewalls get full exposure
Finishing + effects
- Non-wipe topcoat or Ceramic Matte for texture plays
- Chrome applicator if you’re doing pigment rub-ins at the 30–40 second window
Care + hygiene
- Brush caps or cases to protect tips from dust and light
- Lint-free wipes and 70–99% IPA for palette cleanup
- Press-on tips for test-curing thickness before you commit to a set
Pair these with Vextura Studio Paint for coverage, lines, and mixing from the same jar.
When pots shine (and when bottles win)
Choose potted gel when you want
- Crisp structure: French lines, smile lines, razor-sharp borders
- Precision graphics: micro-art, lettering, negative space, color blocking
- Mixability: custom shades, sheer washes, on-palette tweaks
- Control: thicker feel that stays where you place it, fewer floods
- Chrome timing: reliable 30–40 second grip window before sealing
Choose bottled gel when you want
- Speed: two thin coats, done
- High-volume days: repeatable, swipe-on coverage
- Training ease: built-in brush, low learning curve
- Base color under art: a fast background you’ll detail later
Quick rule of thumb
- If the ask is detail, borders, or custom color, reach for the pot.
- If the ask is fast, solid coverage, reach for the bottle.
Vextura Studio Paint sits in the pot category and is tuned for both full-nail coverage and crisp line work, so you can switch tasks without switching products.
Common issues and quick fixes
Wrinkling or ripples
- Why it happens: layers are too thick or under-cured.
- Fix it now: file the surface flat, reapply in thin coats, cure to spec. Rotate thumbs for full exposure.
- Prevent it: two or three thin passes beat one heavy pass.
Streaking or patchy coverage
- Why: under-loaded brush or overworking as it levels.
- Fix: load the brush evenly, float the gel, let it settle for a second, then cure.
- Prevent: switch to a flatter brush size for large nail beds.
Pooling at sidewalls or cuticle
- Why: too much product or pressure.
- Fix: clean edges with a tiny cleanup brush and alcohol before curing.
- Prevent: decant to a palette, pick up less, work from center out.
Shrinking back at the edges
- Why: oil residue, dust, or a slick surface.
- Fix: re-dehydrate, apply a super-thin slip coat and cure, then color.
- Prevent: dust thoroughly and avoid touching the plate after cleansing.
Chrome won’t grab
- Why: over-cured color layer or a slick top surface.
- Fix: try rubbing chrome at a 30–40 second cure window, then seal.
- Prevent: test your lamp timing per shade before committing to a set.
Bleeding lines or fuzzy edges
- Why: too much pressure or a flooded liner.
- Fix: wipe, reload lightly, use a longer liner, anchor your pinky for stability.
- Prevent: practice on a tip; a hair less product = cleaner lines.
Dust or glitter in the pot
- Why: open jar too long or double-dipping.
- Fix: skim contamination off with a spatula, move fresh gel to a clean palette.
- Prevent: cap between nails, always load from a palette.
Gummy feel after cure
- Why: dispersion layer or under-cure.
- Fix: wipe tacky layer as usual; if the core feels soft, file back and reapply thinner.
- Prevent: check lamp output and keep layers lean.
Color inconsistency between nails
- Why: different load or pressure per nail.
- Fix: decant a consistent bead for each finger, repeat the same stroke pattern.
- Prevent: work in small sets and cure together.
Brush keeps dragging
- Why: dry bristles or overloaded pigment.
- Fix: condition the brush with a touch of clear gel, then wipe and reload color.
- Prevent: clean on a palette, not the bottle neck, and cap your brushes between hands.
Meet Vextura Studio Paint (One pot, endless art)
If you love the control of pots but want fewer jars on the desk, this is the sweet spot.

- Coverage + detail in one
Full-nail color in thin, even coats, then switch to razor-sharp lines without changing products. - Self-levels without flooding
Lays down smooth, stays where you place it, and cures clean in lean layers. - Artist-friendly timing
A reliable 30–40 second chrome grip window before sealing, plus crisp cure at standard lamp specs. - Comfort-first formula
10-Free, HEMA-free, TPO-free, vegan. Pigment forward, tuned for thin-layer performance. - Value by the gram
5 g for $11. Built for mixing on a palette and stretching shades across sets. - Plays well with your kit
Works over your usual base or builder. Finish glossy for depth or use Ceramic Matte for velvet texture.
Why it matters: you get a pot that behaves like an artist’s paint for micro-graphics and French work, but it also handles full coverage when you keep coats thin and cure to spec. One jar, fewer swaps, more flow.
FAQs
What is potted gel polish?
Gel color packaged in a jar that you apply with a brush from a palette. It is thicker for control and great for detail and thin, even coverage.
Is potted gel the same as gel polish?
It is a type of gel polish, just in a pot instead of a bottle. The pot format gives you more control and easier mixing.
Potted gel vs bottle gel, which is easier?
Bottled gel is faster for plain color. Potted gel is easier for crisp lines, color blocking, and custom mixes.
Can you use potted gel for full coverage?
Yes, if the formula is made for it. Apply thin coats, cure to spec, and build opacity in passes.
What brushes are best for potted gel?
A flat or oval brush for coverage and a liner (5–9 mm) for detail. Keep a cleanup brush with a hint of alcohol for edges.
How do you apply potted gel without streaks?
Load the brush evenly, float a thin coat, let it self-level for a second, then cure. Repeat for opacity.
What are cure times for potted gel?
As a starting point, cure 30 seconds for light shades and 60 seconds for dark colors or thicker passes. Rotate thumbs for full exposure.
Why does potted gel wrinkle?
Layers are too thick or under-cured. File smooth, reapply in thin coats, and cure fully.
Can you mix potted gels to create new colors or sheers?
Yes. Mix on a palette for custom shades. For sheers, blend a small amount of color into clear base.
Is potted gel soft gel or hard gel?
Most potted color gels are soft gel that soak off. Check the label for removal and cure specs.
Can you chrome over potted gel?
Yes. Rub pigment at a 30 to 40 second cure window, then seal with topcoat.
Can potted gel be used for line work and micro-art?
Absolutely. Load a fine liner lightly and work with steady, low pressure. Cure between passes.
How do I avoid pooling at the sidewalls or cuticle?
Pick up less product, start in the center, float outward, and clean edges before curing.
What if the surface feels gummy after curing?
Wipe the tacky layer as usual. If the core is soft, the coat was too thick or under-cured. File back and reapply thinner.
How should I store and handle pots?
Load from a palette, cap jars quickly, keep away from dust and light, and avoid double-dipping.
Does potted gel work over builder or rubber base?
Yes. Build structure first, then apply thin, even color coats and cure to spec.